(Note: this is part of my ongoing series on cheaply selfhosting)
I recently shared how I set up a (OpenMediaVault) home server on a cheap mini-PC. After posting it, I received a number of suggestions that inspired me to make a few additional tweaks to improve the security and usability of my server.
Read more if you’re interested in setting up (on an OpenMediaVault v6 server):
- Pihole, a “DNS filter” that blocks ads / trackers
- using Pihole as a local DNS server to have custom web addresses for software services running on your network and Nginx to handle port forwarding
- Twingate (a better alternative to opening up a port and setting up Dynamic DNS to grant secure access to your network)
Pihole
Pihole is a lightweight local DNS server (it gets its name from the Raspberry Pi, a <$100 device popular with hobbyists, that it can run fully on).
A DNS (or Domain Name Server) converts human readable addresses (like www.google.com) into IP addresses (like 142.250.191.46). As a result, every piece of internet-connected technology is routinely making DNS requests when using the internet. Internet service providers typically offer their own DNS servers for their customers. But, some technology vendors (like Google and CloudFlare) also offer their own DNS services with optimizations on speed, security, and privacy.
A home-grown DNS server like Pihole can layer additional functionality on top:
- DNS “filter” for ad / tracker blocking: Pihole can be configured to return dummy IP addresses for specific domains. This can be used to block online tracking or ads (by blocking the domains commonly associated with those activities). While not foolproof, one advantage this approach has over traditional ad blocking software is that, because this blocking happens at the network level, the blocking extends to all devices on the network (such as internet-connected gadgets, smart TVs, and smartphones) without needing to install any extra software.
- DNS caching for performance improvements: In addition to the performance gains from blocking ads, Pihole also boosts performance by caching commonly requested domains, reducing the need to “go out to the internet” to find a particular IP address. While this won’t speed up a video stream or download, it will make content from frequently visited sites on your network load faster by skipping that internet lookup step.
To install Pihole using Docker on OpenMediaVault:
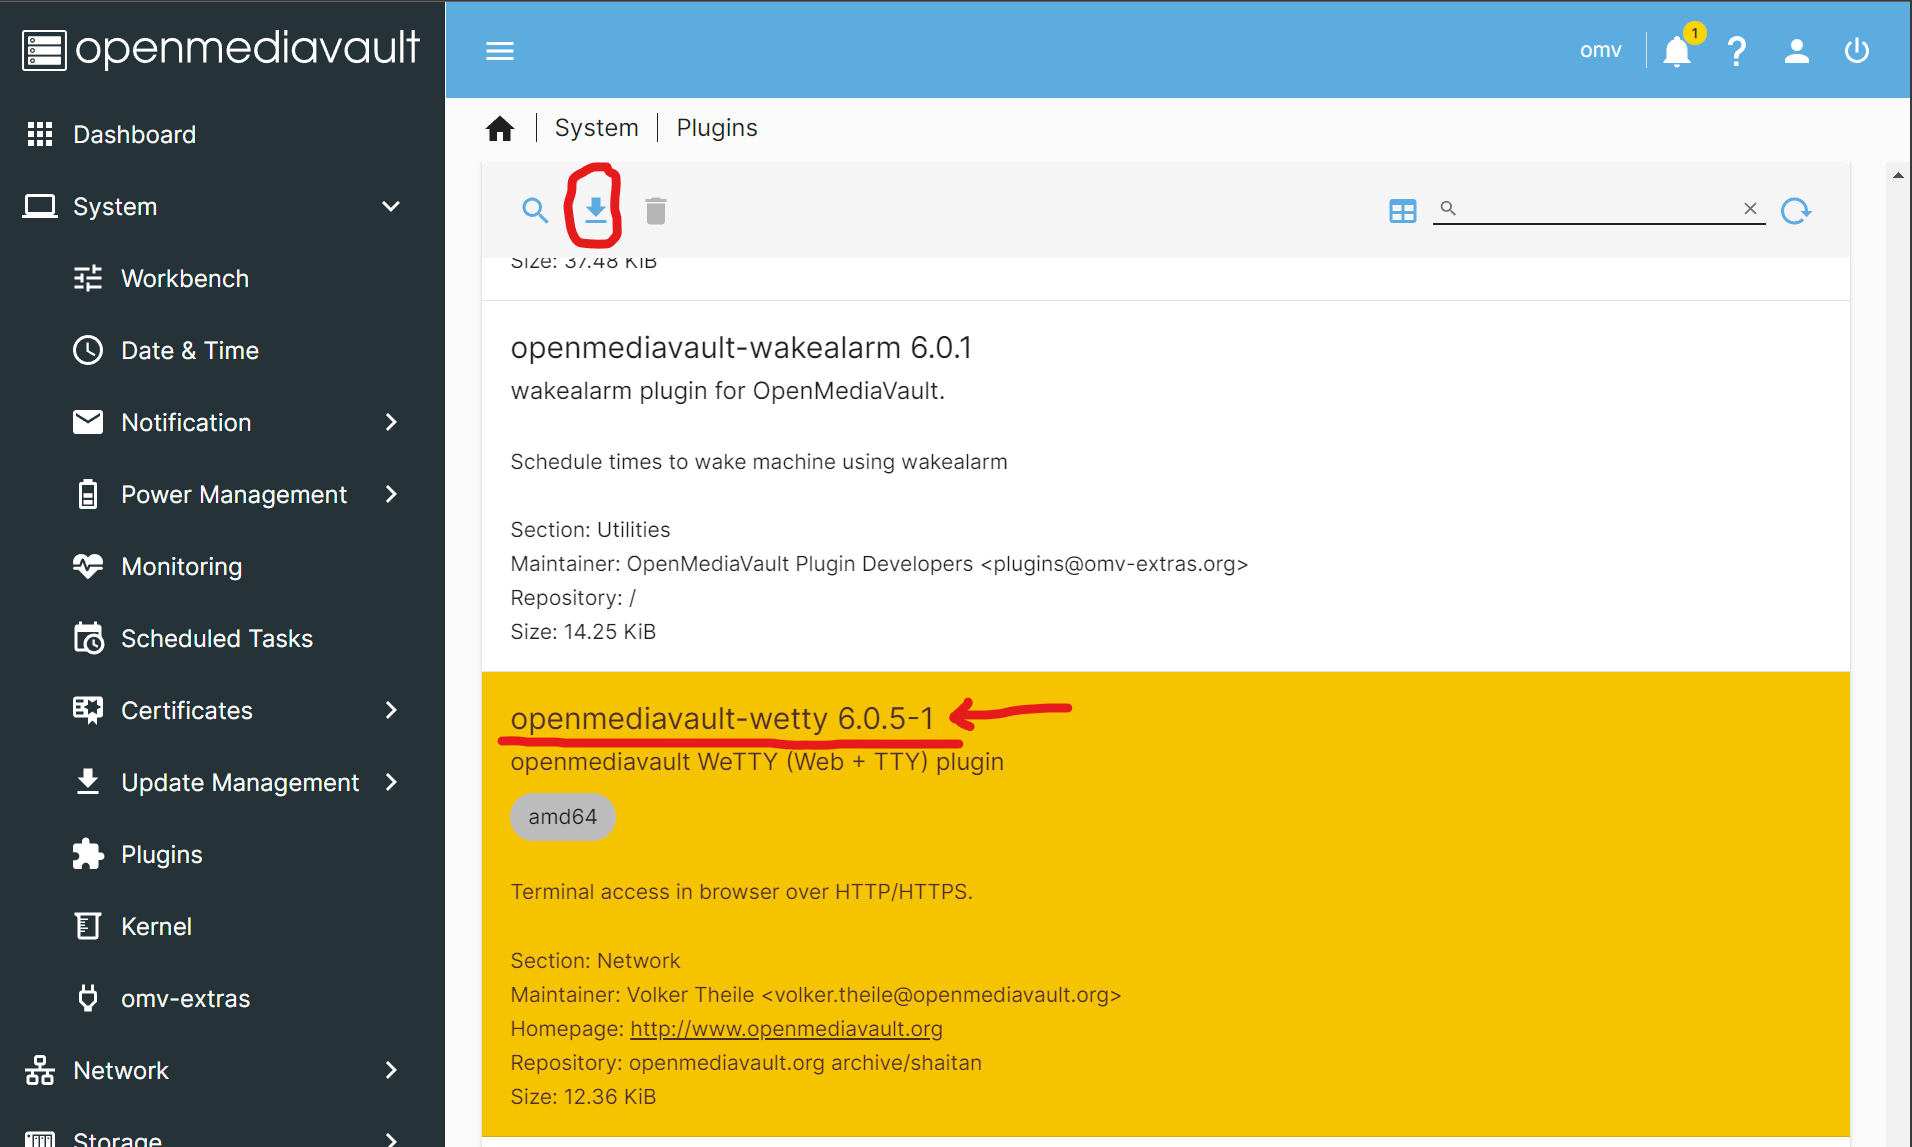
- If you haven’t already, make sure you have OMV Extras and Docker Compose installed (refer to the section
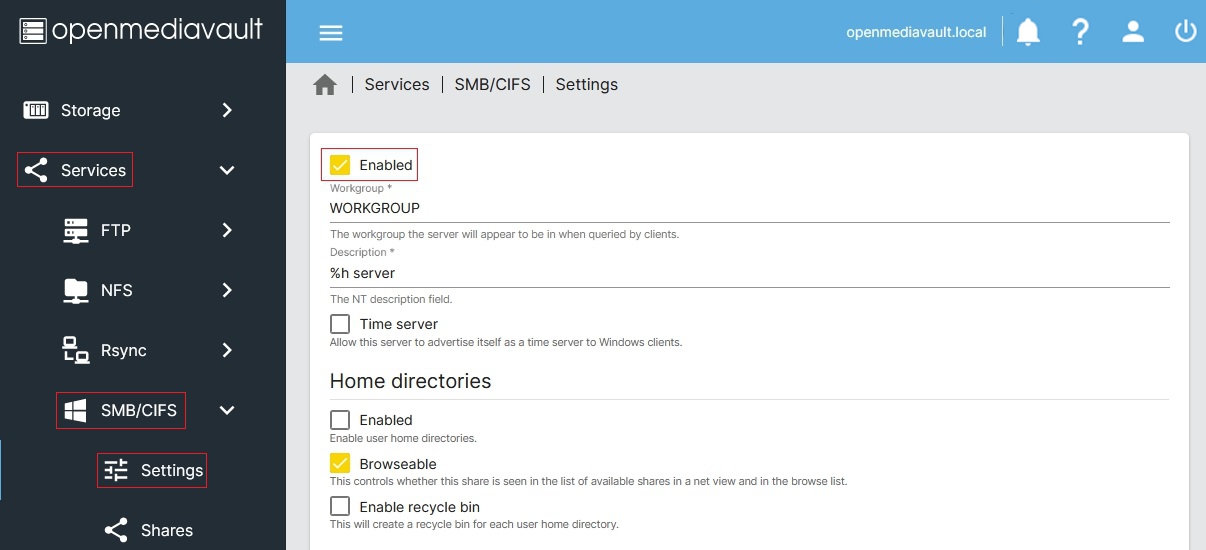
Docker and OMV-Extrasin my previous post) and have a static local IP address assigned to the server. - Login to your OpenMediaVault web admin panel, go to [
Services>Compose>Files], and press the button. Under
 Nameput downPiholeand underFile, adapt the following (making sure the number of spaces are consistent)
You’ll need to replaceversion: "3"
services:
pihole:
container_name: pihole
image: pihole/pihole:latest
ports:
- "53:53/tcp"
- "53:53/udp"
- "8000:80/tcp"
environment:
TZ: 'America/Los_Angeles'
WEBPASSWORD: '<Password for the web admin panel>'
FTLCONF_LOCAL_IPV4: '<your server IP address>'
volumes:
- '<absolute path to shared config folder>/pihole:/etc/pihole'
- '<absolute path to shared config folder>/dnsmasq.d:/etc/dnsmasq.d'
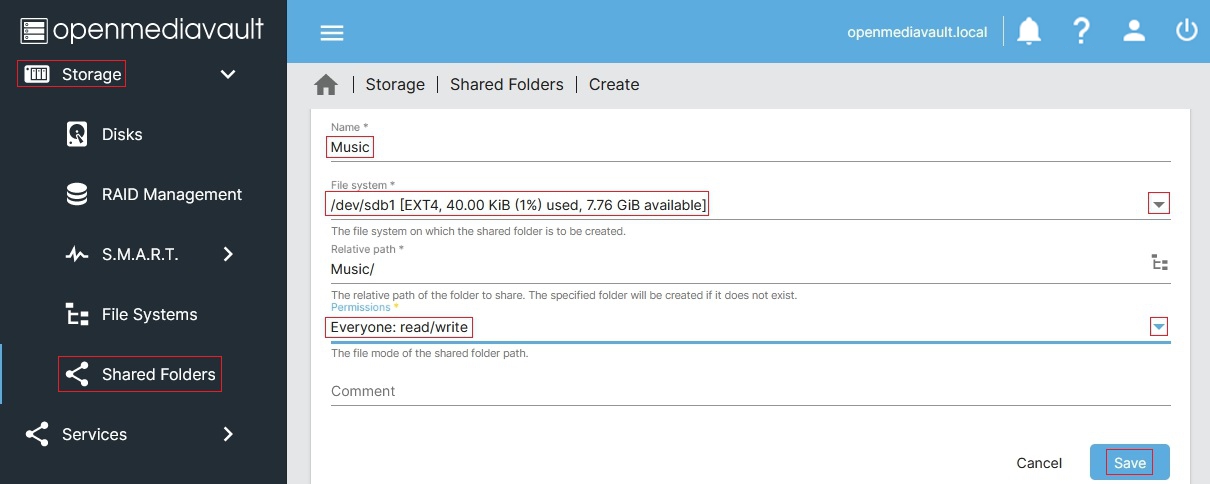
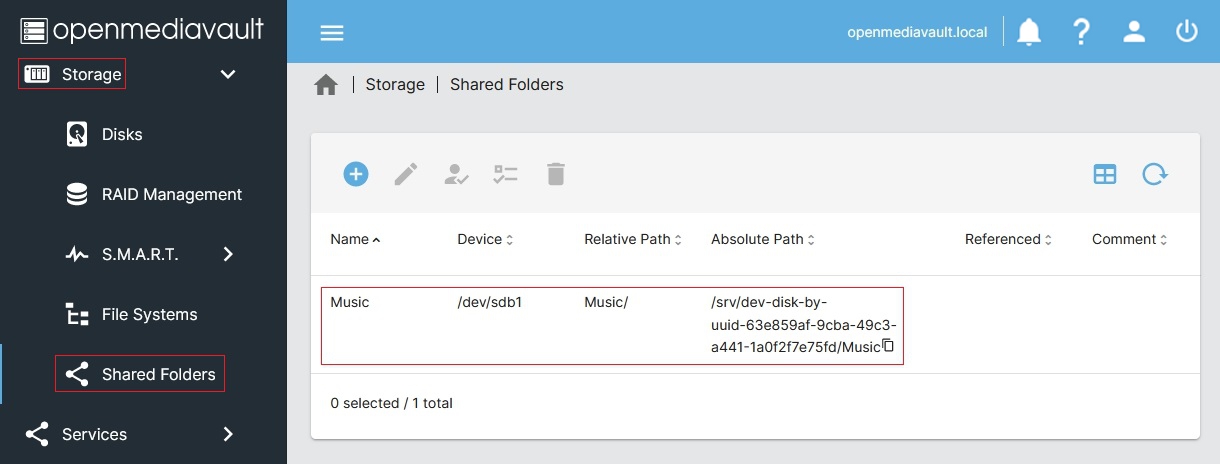
restart: unless-stopped<Password for the web admin panel>with the password you’ll want to use to be access the Pihole web configuration interface,<your server IP address>with the static local IP address for your server, and<absolute path to shared config folder>with the absolute path to the config folder where you want Docker-installed applications to store their configuration information (accessible by going to[Storage > Shared Folders]in the administrative panel).
I live in the Bay Area so I set timezoneTZtoAmerica/Los_Angeles. You can find yours here.
UnderPorts, I’ve kept the port53reservation (as this is the standard port for DNS requests) but I’ve chosen to map the Pihole administrative console to port8000(instead of the default of port80to avoid a conflict with the OpenMediaVault admin panel default). Note: This will prevent you from using Pihole’s defaultpi.holedomain as a way to get to the Pihole administrative console out-of-the-box. Because standard web traffic goes to port 80 (and this configuration has Pihole listening at port 8080),pi.holewould likely just direct you to the OpenMediaVault panel. While you could letpi.holetake over port 80, you would need to move OpenMediaVault’s admin panel to a different port (which itself has complexity). I ultimately opted with keeping OpenMediaVault at port 80 knowing that I could configure Pihole and Nginx proxy (see below) to redirectpi.holeto the right port.
You’ll notice this configures twovolumes, one fordnsmasq.d, which is the DNS service, and one forpiholewhich provides an easy way to configurednsmasq.dand download blocklists.
Note: the above instructions assume your home network, like most, is IPv4 only. If you have an IPv6 network, you will need to add anIPv6: Trueline underenvironment:and replace theFTLCONF_LOCAL_IPV4:'<server IPv4 address>'withFTLCONF_LOCAL_IPV6:'<server IPv6 address>'. For more information, see the official Pihole Docker instructions.
Once you’re done, hitSaveand you should be returned to your list of Docker compose files for the next step. Notice that the newPiholeentry you created has aDownstatus, showing the container has yet to be initiated. - Disabling
systemd-resolved: Most modern Linux operating systems include a built-in DNS resolver that listens on port 53 calledsystemd-resolved. Prior to initiating the Pihole container, you’ll need to disable this to prevent that port conflict. Use WeTTy (refer to the sectionDocker and OMV-Extrasin my previous post) or SSH to login as therootuser to your OpenMediaVault command line. Enter the following command:
Look for the line that saysnano /etc/systemd/resolved.conf#DNSStubListener=yesand replace it withDNSStubListener=no, making sure to remove the#at the start of the line. (HitCtrl+Xto exit,Yto save, andEnterto overwrite the file). This configuration will tellsystemd-resolvedto stop listening to port 53.
To complete the configuration change, you’ll need to edit the symlink/etc/resolv.confto point to the file you just edited by running:
Now all that remains is to restartsh -c 'rm /etc/resolv.conf && ln -s /etc/systemd/resolved.conf /etc/resolv.conf'systemd-resolved:systemctl restart systemd-resolved - How to start / update / stop / remove your Pihole container: You can manage all of your Docker Compose files by going to
[Services>Compose>Files] in the OpenMediaVault admin panel. Click on thePiholeentry (which should turn it yellow) and press the (up) button. This will create the container, download any files needed, and, if you properly disabled
 systemd-resolvedin the last step, initiate Pihole.
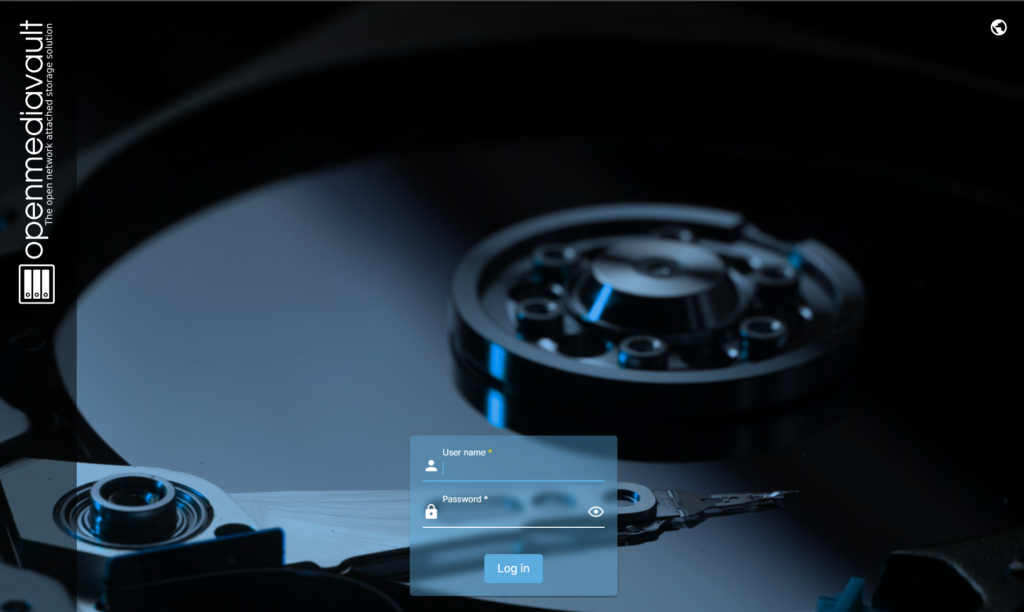
And that’s it! To prove it worked, go toyour-server-ip:8000in a browser and you should see the login for the Pihole admin webpage (see below).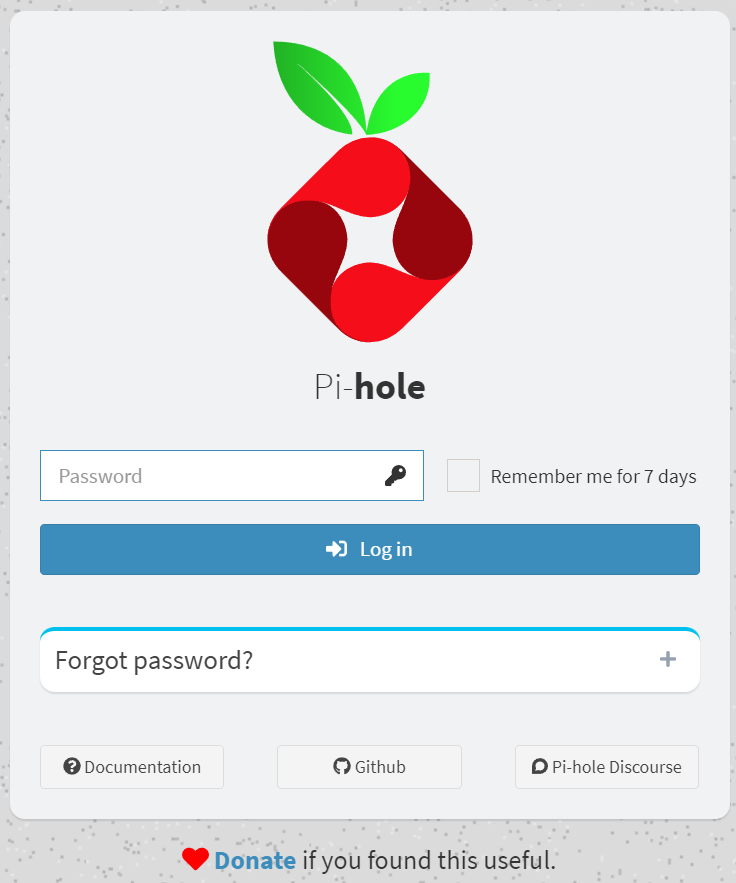
From time to time, you’ll want to update the container. OMV makes this very easy. Every time you press the (pull) button in the [
Services>Compose>Files] interface, Docker will pull the latest version (maintained by the Pihole team).
Now that you have Pihole running, it is time to enable and configure it for your network.
- Test Pihole from a computer: Before you change your network settings, it’s a good idea to make sure everything works.
- On your computer, manually set your DNS service to your Pihole by putting in your server IP address as the address for your computer’s primary DNS server (Mac OS instructions; Windows instructions; Linux instructions). Be sure to leave any alternate / secondary addresses blank (many computers will issue DNS requests to every server they have on their list and if an alternative exists you may not end up blocking anything).
- (Temporarily) disable any ad blocking service you may have on your computer / browser you want to test with (so that this is a good test of Pihole as opposed to your ad blocking software). Then try to go to
https://consumerproductsusa.com/— this is a URL that is blocked by default by Pihole. If you see a very spammy website promising rewards, either your Pihole does not work or you did not configure your DNS correctly.
- Finally login to the Pihole configuration panel (
your-server-ip:8000) using the password you set up during installation. From the dashboard click on theQueries Blockedbox at the top (your colors may vary but it’s the red box on my panel, see below).
On the next screen, you should see the domainconsumerproductsusa.comnext to the IP address of your computer, confirming that the address was blocked.
You can now turn your ad blocking software back on! - You should now set the DNS service on your computer back to “automatic” or “DHCP” so that it will inherit its DNS settings from the network/router (and especially if this is a laptop that you may use on another network).
- Configure DNS on router: Once you’ve confirmed that the Pihole service works, you should configure the default DNS settings on your router to make Pihole the DNS service for your entire network. The instructions for this will vary by router manufacturer. If you use Google Wifi as I do, here are the instructions.
Once this is completed, every device which inherits DNS settings from the router will now be using Pihole for their DNS requests.
Note: one downside of this approach is that the Pihole becomes a single point of failure for the entire network. If the Pihole crashes or fails, for any reason, none of your network’s DNS requests will go through until the router’s settings are changed or the Pihole becomes functional again. Pihole generally has good reliability so this is unlikely to be an issue most of the time, but I am currently using Google’s DNS as a fallback on my Google Wifi (for the times when something goes awry with my server) and I would also encourage you to know how to change the DNS settings for your router in case things go bad so that your access to the internet is not taken out unnecessarily. - Configure Pihole: To get the most out of Pihole’s ad blocking functionality, I would suggest three things
- Select Good Upstream DNS Servers: From the Pihole administrative panel, click on
Settings. Then select theDNStab. Here, Pihole allows you to configure which external DNS services the DNS requests on your network should go to if they aren’t going to be blocked and haven’t yet been cached. I would recommend selecting the checkboxes next to Google and Cloudflare given their reputations for providing fast, secure, and high quality DNS services (and selecting multiple will provide redundancy). - Update Gravity periodically: Gravity is the system by which Pihole updates its list of domains to block. From the Pihole administrative panel, click on
[Tools > Update Gravity]and click theUpdatebutton. If there are any updates to the blocklists you are using, these will be downloaded and “turned on”. - Configure Domains to block/allow: Pihole allows administrators to granularly customize the domains to block (blacklist) or allow (whitelist). From the Pihole administrative panel, click on
Domains. Here, an admin can add a domain (or a regular expression for a family of domains) to the blacklist (if it’s not currently blocked) or the whitelist (if it currently is) to change what happens when a user on the network accesses the DNS.
I added whitelist exclusions forlink.axios.comto let me click through links from the Axios email newsletters I receive andwww.googleadservices.comto let my wife click through Google-served ads. Pihole also makes it easy to manually take a domain that a device on your network has requested to block/allow. Tap onTotal Queriesfrom the Pihole dashboard, click on the IP address of the device making the request, and you’ll see every DNS request (including those which were blocked) with a link beside them to add to the domain whitelist or blacklist.
Pihole will also allow admins to configure different rules for different sets of devices. This can be done by calling out clients (which can be done by clicking onClientsand picking their IP address / MAC address / hostnames), assigning them to groups (which can be defined by clicking onGroups), and then configuring domain rules to go with those groups (inDomains). Unfortunately because Google Wifi simply forwards DNS requests rather than distributes them, I can only do this for devices that are configured to directly point at the Pihole, but this could be an interesting way to impose parental internet controls.
- Select Good Upstream DNS Servers: From the Pihole administrative panel, click on
Now you have a Pihole network-level ad blocker and DNS cache!
Local DNS and Nginx proxy
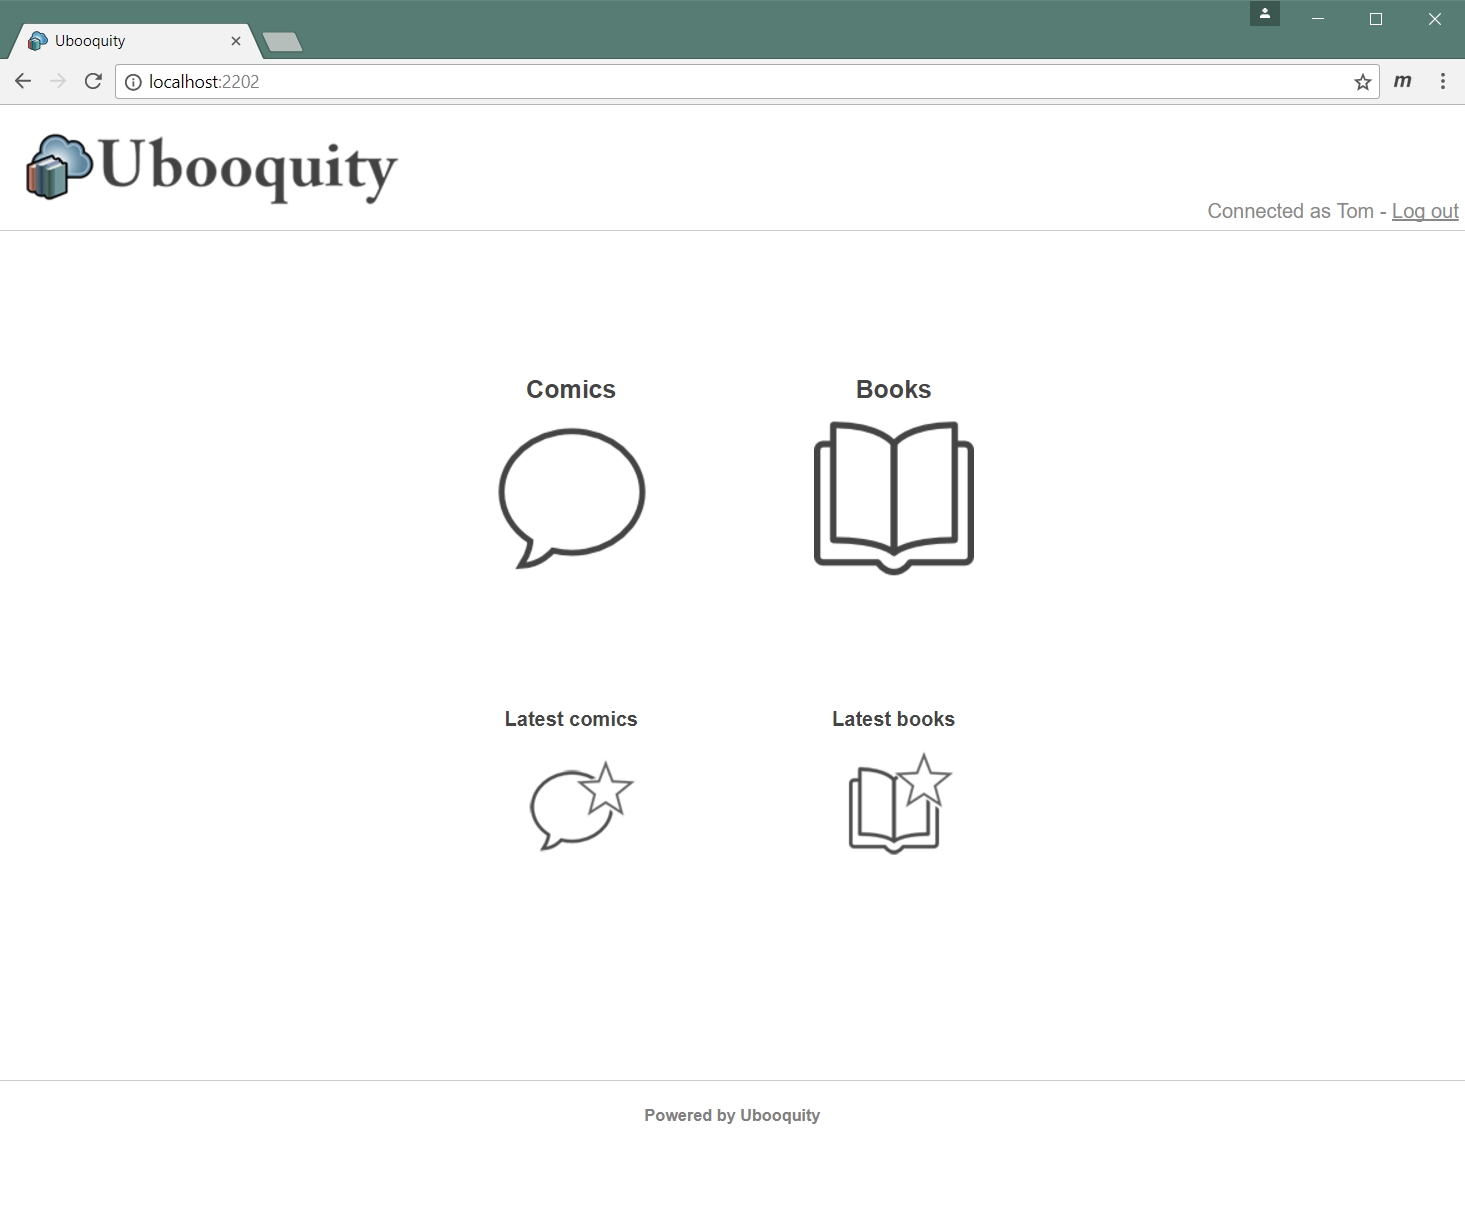
As a local DNS server, Pihole can do more than just block ads. It also lets you create human readable addresses for services running on your network. In my case, I created one for the OpenMediaVault admin panel (omv.home), one for WeTTy (wetty.home), and one for Ubooquity (ubooquity.home).
If your setup is like mine (all services use the same IP address but different ports), you will need to set up a proxy as DNS does not handle port forwarding. Luckily, OpenMediaVault has Nginx, a popular web server with a performant proxy, built-in. While many online tutorials suggest installing Nginx Proxy Manager, that felt like overkill, so I decided to configure Nginx directly.
To get started:
- Configure the A records for the domains you want in Pihole: Login to your Pihole administrative console (
your-server-ip:8000) and click on[Local DNS > DNS Records]from the sidebar. Under the section calledAdd a new domain/IP combination, fill out theDomain:you want for a given service (likeomv.homeorwetty.home) and theIP Address:(if you’ve been following my guides, this will beyour-server-ip). Press theAddbutton and it will show up below. Repeat for all the domains you want. If you have a setup similar to mine, you will see many domains pointed at the same IP address (because the different services are simply different ports on my server).
To test if these work, enter any of the domains you just put in to a browser and it should take you to the login page for the OpenMediaVault admin panel (as currently they are just pointing at your server IP address).
Note 1: while you can generally use whatever domains you want, it is suggested that you don’t use a TLD that could conflict with an actual website (i.e..com) or that are commonly used by networking systems (i.e..localor.lan). This is why I used.homefor all of my domains (the IETF has a list they recommend, although it includes.lanwhich I would advise against as some routers such as Google Wifi use this)
Note 2: Pihole itself automatically tries to forwardpi.holeto its web admin panel, so you don’t need to configure that domain. The next step (configuring proxy port forwarding) will allowpi.holeto work. - Edit the Nginx proxy configuration: Pihole’s Local DNS server will send users looking for one of the domains you set up (i.e.
wetty.home) to the IP address you configured. Now you need your server to forward that request to the appropriate port to get to the right service.
You can do this by taking advantage of the fact that Nginx, by default, will load any.conffile in the/etc/nginx/conf.d/directory as a proxy configuration. Pick any file name you want (I went withdothome.confbecause all of my service domains end with.home) and after using WeTTy or SSH to login as root, run:
The first time you run this, it will open up a blank file. Nginx looks at the information in this file for how to redirect incoming requests. What we’ll want to do is tell Nginx that when a request comes in for a particular domain (i.e.nano /etc/nginx/conf.d/<your file name>.confubooquity.homeorpi.hole) that request should be sent to a particular IP address and port.
Manually writing these configuration files can be a little daunting and, truth be told, the text file I share below is the result of a lot of trial and error, but in general there are 2 types of proxy commands that are relevant for making your domain setup work.
One is aproxy_passwhere Nginx will basically take any traffic to a given domain and just pass it along (sometimes with additional configuration headers). I use this below forwetty.home,pi.hole,ubooquityadmin.home, andubooquity.home. It worked without the need to pass any additional headers for WeTTy and Ubooquity, but forpi.hole, I had to set several additional proxy headers (which I learned from this post on Reddit).
The other is a 301 redirect where you tell the client to simply forward itself to another location. I use this forubooquityadmin.homebecause the actual URL you need to reach is not/but/admin/and the 301 makes it easy to setup an automatic forward. I then use the regex match~ /(.*)$to make sure every other URL isproxy_pass‘d to the appropriate domain and port.
You’ll notice I did not include the domain I configured for my OpenMediaVault console (omv.home). That is becauseomv.homealready goes to the right place without needing any proxy to port forward.server {If you are using other domains, ports, or IP addresses, adjust accordingly. Be sure all your curly braces have their mates (
listen 80;
server_name pi.hole;
location / {
proxy_pass http://<your-server-ip>:8000;
proxy_set_header Host $host;
proxy_set_header X-Real-IP $host;
proxy_set_header X-ForwardedFor $proxy_add_x_forwarded_for;
proxy_hide_header X-Frame-Options;
proxy_set_header X-Frame-Options "SAMEORIGIN";
proxy_read_timeout 90;
}
}
server {
listen 80;
server_name wetty.home;
location / {
proxy_pass http://<your-server-ip>:2222;
proxy_set_header Host $host;
proxy_set_header X-Real-IP $host;
proxy_set_header X-ForwardedFor $proxy_add_x_forwarded_for;
}
}
server {
listen 80;
server_name ubooquity.home;
location / {
proxy_pass http://<your-server-ip>:2202;
}
}
server {
listen 80;
server_name ubooquityadmin.home;
location =/ {
return 301 http://ubooquityadmin.home/admin;
}
location ~ /(.*)$ {
proxy_pass http://<your-server-ip>:2203/$1;
}
}{}) and that each line ends with a semicolon (;) or Nginx will crash. I useTab‘s between statements (i.e. betweenlistenand80) to format them more nicely but Nginx will accept any number or type of whitespace.
To test if your new configuration worked, save your changes (hitCtrl+Xto exit,Yto save, andEnterto overwrite the file if you are editing a pre-edited one). In the command line, run the following command to restart Nginx with your new configuration loaded.
Try to login to your OpenMediaVault administrative panel in a browser. If that works, it means Nginx is up and running and you at least didn’t make any obvious syntax errors!systemctl restart nginx
Next try to access one of the domains you just configured (for instancepi.hole) to test if the proxy was configured correctly.
If either of those steps failed, use WeTTy or SSH to log back in to the command line and use the command above to edit the file (you can delete everything if you want to start fresh) and rerun the restart command after you’ve made changes to see if that fixes it. It may take a little bit of doing if you have a tricky configuration but once you’re set, everyone on the network can now use your configured addresses to access the services on your network.
Twingate
In my previous post, I set up Dynamic DNS and a Wireguard VPN to grant secure access to the network from external devices (i.e. a work computer, my smartphone when I’m out, etc.). While it worked, the approach had two flaws:
- The work required to set up each device for Wireguard is quite involved (you have to configure it on the VPN server and then pass credentials to the device via QR code or file)
- It requires me to open up a port on my router for external traffic (a security risk) and maintain a Dynamic DNS setup that is vulnerable to multiple points of failure and could make changing domain providers difficult.
A friend of mine, after reading my post, suggested I look into Twingate instead. Twingate offers several advantages, including:
- Simple graphical configuration of which resources should be made available to which devices
- Easier to use client software with secure (but still easy to use) authentication
- No need to configure Dynamic DNS or open a port
- Support for local DNS rules (i.e. the domains I configured in Pihole)
I was intrigued (it didn’t hurt that Twingate has a generous free Starter plan that should work for most home server setups). To set up Twingate to enable remote access:
- Create a Twingate account and Network: Go to their signup page and create an account. You will then be asked to set up a unique Network name. The resulting address,
<yournetworkname>.twingate.com, will be your Network configuration page from where you can configure remote access. - Add a Remote Network: Click the
Addbutton on the right-hand-side of the screen. SelectOn PremiseforLocationand enter any name you choose (I went withHome network). - Add Resources: Select the Remote Network you just created (if you haven’t already) and use the
Add Resourcebutton to add an individual domain name or IP address and then grant access to a group of users (by default, it will go to everyone).
With my configuration, I added 5 domains (pi.hole+ the four.homedomains I configured through Pihole) and 1 IP address (for the server, to handle theubooquityadmin.homeforwarding and in case there was ever a need to access an additional service on my server that I had not yet created a domain for).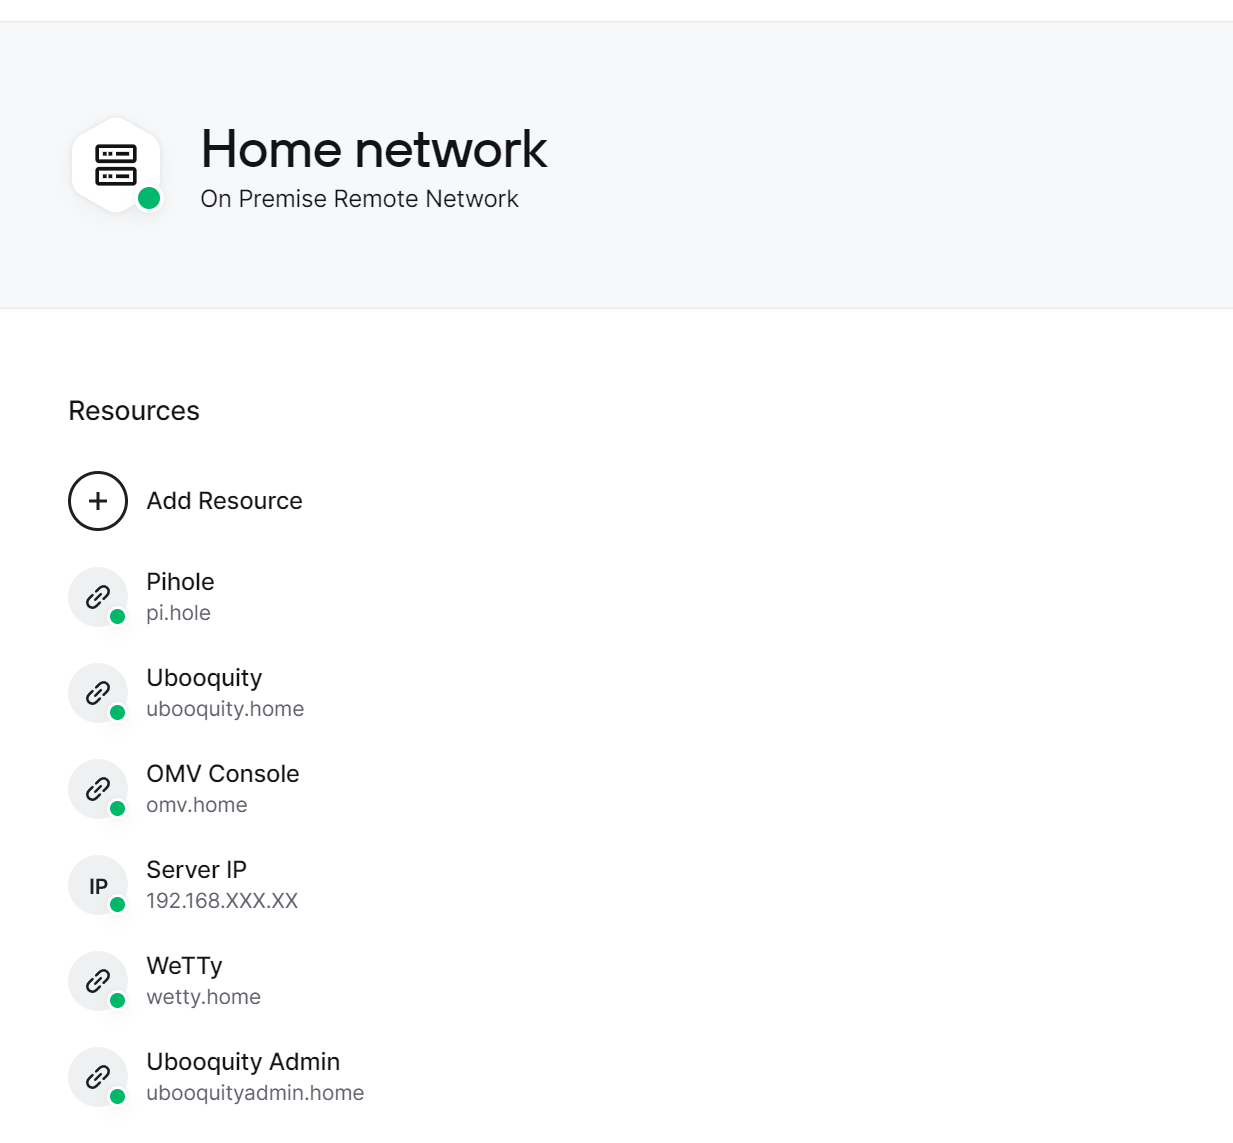
- Install Connector Docker Container: To make the selected network resources available through Twingate requires installing a Twingate Connector to something internet-connected on the network.
Press theDeploy Connectorbutton on one of the connectors on the right-hand-side of the Remote Network page (mine is calledflying-mongrel). SelectDockerin Step 1 to get Docker instructions (see below). Then press theGenerate Tokensbutton under Step 2 to create the tokens that you’ll need to link your Connector to your Twingate network and resources.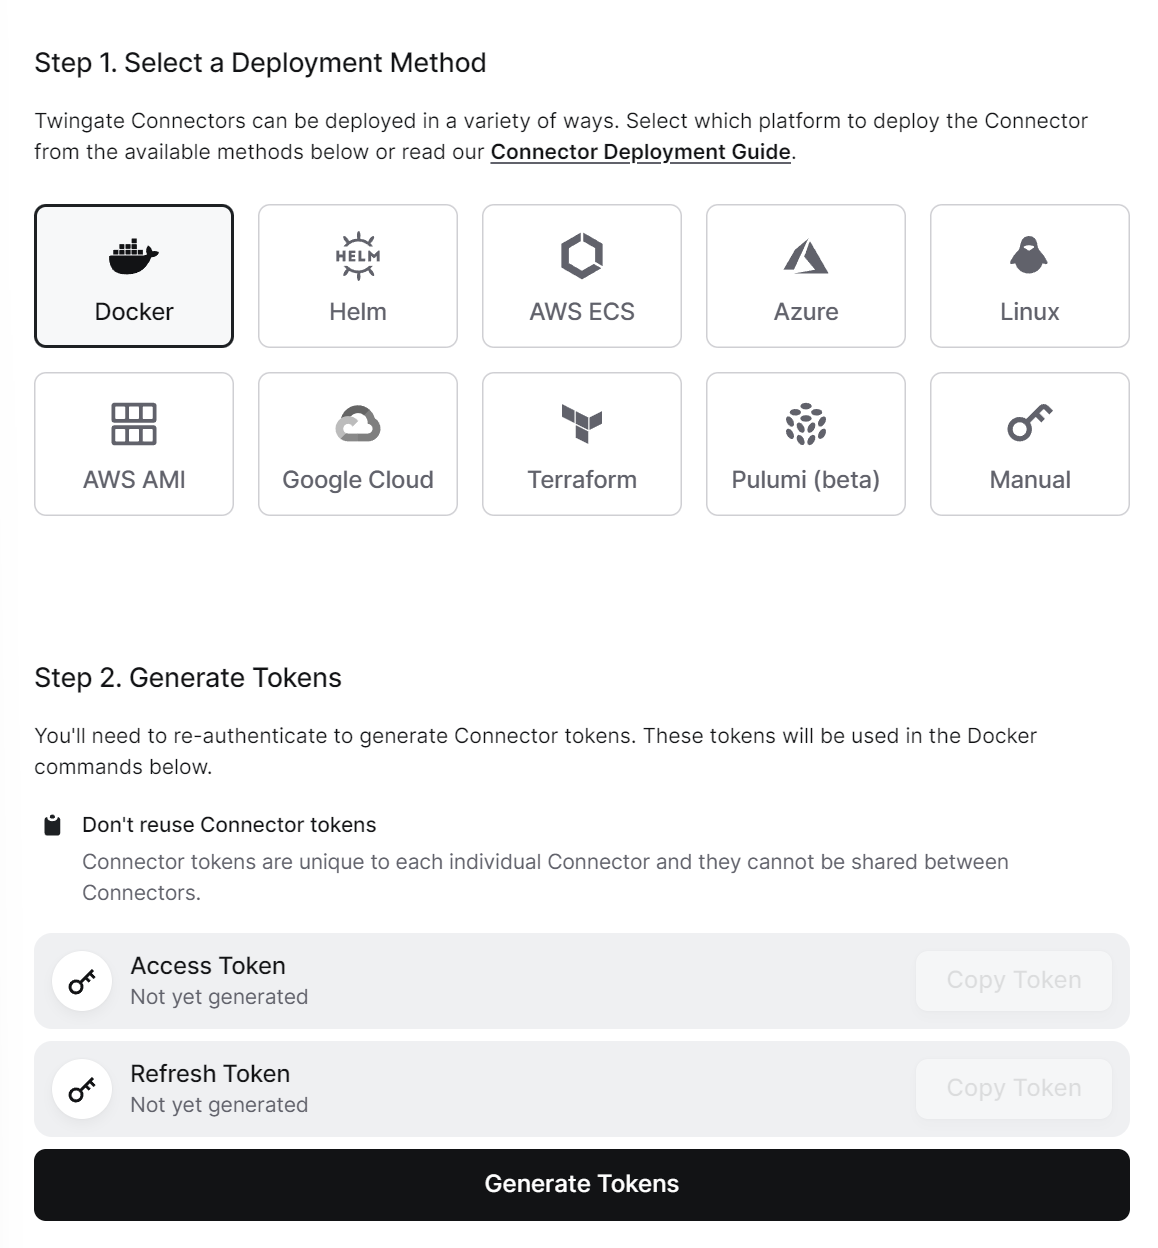
With the Access Token and Refresh Token saved, you are ready to configure Docker to install. Login to the OpenMediaVault administrative panel and go to[Services > Compose > Files]and press the button. Under Nameput downTwingate Connectorand underFile, enter the following (making sure the number of spaces are consistent)
You’ll need to replaceservices:
twingate_connector:
container_name: twingate_connector
restart: unless-stopped
image: "twingate/connector:latest"
environment:
- SSL_CERT_FILE=/etc/ssl/certs/ca-certificates.crt
- TWINGATE_API_ENDPOINT=/connector.stock
- TWINGATE_NETWORK=<your network name>
- TWINGATE_ACCESS_TOKEN=<your connector access token>
- TWINGATE_REFRESH_TOKEN=<your connector refresh token>
- TWINGATE_LOG_LEVEL=7<your network name>with the name of the Twingate network you created,<your connector access token>and<your connector refresh token>with the access token and refresh token generated from the Twingate website. Do not add any single or double quotation marks around the network name or the tokens as they will result in a failed authentication with Twingate (as I was forced to learn through experience).
Once you’re done, hitSaveand you should be returned to your list of Docker compose files. Click on the entry forTwingate Connectoryou just created and then press the (up) button to initialize the container.
Go back to your Twingate network page and select the Remote Network your Connector is associated with. If you were successful, within a few moments, the Connector’s status will reflect this (see below for the before and after).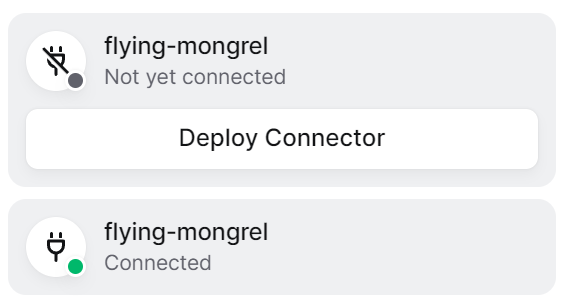
If, after a few minutes there is still no change, you should check the container logs. This can be done by going to[Services > Compose > Services]in the OpenMediaVault administrative panel. Select theTwingate Connectorcontainer and press the (logs) button in the menubar. The
 TWINGATE_LOG_LEVEL=7setting in the Docker configuration file sets the Twingate Connector to report all activities in great detail and should give you (or a helpful participant on the Twingate forum) a hint as to what went wrong. - Add Users and Install Clients: Once the configuration is done and the Connector is set up, all that remains is to add user accounts and install the Twingate client software on the devices that should be able to access the network resources.
Users can be added (or removed) by going to your Twingate network page and clicking on theTeamlink in the menu bar. You canAdd User(via email) or otherwise customize Group policies. Be mindful of the Twingate Starter plan limit to 5 users…
As for the devices, the client software can be found at https://get.twingate.com/. Once installed, to access the network, the user will simply need to authenticate. - Remove my old VPN / Dynamic DNS setup. This is not strictly necessary, but if you followed my instructions from before, you can now undo those by:
- Closing the port you opened from your Router configuration
- Disabling Dynamic DNS setup from your domain provider
- “Down”-ing and deleting the container and configuration file for DDClient (you can do this by going to
[Services > Compose > Files]from OpenMediaVault admin panel) - Deleting the configured Wireguard clients and tunnels (you can do this by going to
[Services > Wireguard]from the OpenMediaVault admin panel) and then disabling the Wireguard plugin (go to[System > Plugins]) - Removing the Wireguard client from my devices
And there you have it! A secure means of accessing your network while retaining your local DNS settings and avoiding the pitfalls of Dynamic DNS and opening a port.
Resources
There were a number of resources that were very helpful in configuring the above. I’m listing them below in case they are helpful:
- The Official Pi-hole Documentation
- r/pihole
- The official Docker Pi-hole setup guide
- Nginx Beginner’s Guide to Setting up Proxy Server
- Twingate Quick Start
- Twingate Guide to Deploying Connectors with Docker Compose
- Twingate Homelab & Personal Use Cases page
- Twingate Forum
(If you’re interested in how to setup a home server on OpenMediaVault or how to self-host different services, check out all my posts on the subject)