
(Note: this is part of my ongoing series on cheaply selfhosting)
Through some readily available Docker containers and OpenMediaVault, I have a cheap mini-PC which serves as:
- ad blocker for all the devices in my household
- media streamer (so I can play movies and read downloaded ebooks/documents anywhere that has internet access)
- acts as my personal RSS/newsreader
- handles every PDF related operation you can think of
- functions as network storage for my family
But, over time, as the server has picked up more uses, it’s also become a vulnerability. If any of the drives on my machine ever fail, I’ll lose data that is personally (and sometimes economically) significant.
I needed a home server backup plan.
Duplicati
Duplicati is open source software that helps you efficiently and securely backup specific partitions and folders to any destination. This could be another home server or it can be a cloud service provider (like Amazon S3 or Backblaze B2 or even a consumer service like Dropbox, Google Drive, and OneDrive). While there are many other tools that can support backup, I went with Duplicati because I wanted:
- Support for consumer storage services as a target: I am a customer of Google Drive (through Google One) and Microsoft 365 (which comes with generous OneDrive subscription) and only intend to backup some of the files I’m currently storing (mainly some of the network storage I’m using to hold important files)
- A web-based control interface so I could access this from any computer (and not just whichever machine had the software I wanted)
- An active user form so I could find how-to guides and potentially get help
- Available as a Docker container on linuxserver.io: linuxserver.io is well-known for hosting and maintaining high quality and up-to-date Docker container images
Installation
To install Duplicati on OpenMediaVault:
- If you haven’t already, make sure you have OMV Extras and Docker Compose installed (refer to the section
Docker and OMV-Extrasin my previous post, you’ll want to follow all 10 steps as I refer to different parts of the process throughout this post) and have a static local IP address assigned to your server. - Login to your OpenMediaVault web admin panel, and then go to
[Services > Compose > Files]in the sidebar. Press the button in the main interface to add a new Docker compose file.
UnderNameput downDuplicatiand underFile, adapt the following (making sure the number of spaces are consistent)
Under---
services:
duplicati:
image: lscr.io/linuxserver/duplicati:latest
container_name: duplicati
ports:
- <unused port number>:8200
environment:
- TZ: 'America/Los_Angeles'
- PUID=<UID of Docker User>
- PGID=<GID of Docker User>
volumes:
- <absolute paths to folders to backup>:<names to use in Duplicati interface>
- <absolute path to shared config folder>/Duplicati:/config
restart: unless-stoppedports:, make sure to add an unused port number (I went with8200).
Replace<absolute path to shared config folder>with the absolute path to the config folder where you want Docker-installed applications to store their configuration information (accessible by going to[Storage > Shared Folders]in the administrative panel).
You’ll notice there’s extra lines undervolumes:for<absolute paths to folders to backup>. This should correspond with the folders you are interested in backing up. You should map them to names that will show up in the Duplicati interface that you recognize. For example, I directed my<absolute path to shared config folder>to/containerconfigsas one of the things I want to make sure I backup are my containers.
Once you’re done, hitSaveand you should be returned to your list of Docker compose files for the next step. Notice that the newDuplicatientry you created has aDownstatus, showing the container has yet to be initialized. - To start your Duplicati container, click on the new
Duplicatientry and press the (up) button. This will create the container, download any files needed, and run it.
To show it worked, go toyour-servers-static-ip-address:8200from a browser that’s on the same network as your server (replacing8200if you picked a different port in the configuration file above) and you should see the Duplicati web interface which should look something like below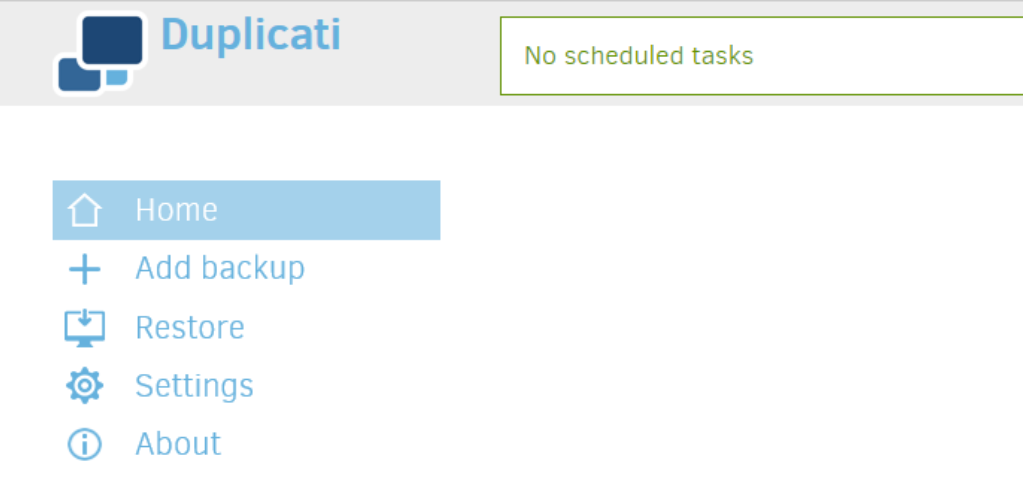
- You can skip this step if you didn’t set up Pihole and local DNS / Nginx proxy or if you don’t care about having a user-readable domain name for Duplicati. But, assuming you do and you followed my instructions, open up WeTTy (which you can do by going to
wetty.homein your browser if you followed my instructions or by going to[Services > WeTTY]from OpenMediaVault administrative panel and pressingOpen UIbutton in the main panel) and login as the root user. Run:
Pick out the file you created before for your domains and runcd /etc/nginx/conf.d
ls
This opens up the text editor nano with the file you just listed. Use your cursor to go to the very bottom of the file and add the following lines (making sure to use tabs and end each line with a semicolon)nano <your file name>.conf
And then hitserver {
listen 80;
server_name <duplicati.home or the domain you'd like to use>;
location / {
proxy_pass http://<your-server-static-ip>:<duplicati port no.>;
}
}Ctrl+Xto exit,Yto save, andEnterto overwrite the existing file. Then in the command line run the following to restart Nginx with your new configuration loaded.
Now, if your server sees a request forsystemctl restart nginxduplicati.home(or whichever domain you picked), it will direct them to Duplicati.
Login to your Pihole administrative console (you can just go topi.holein a browser) and click on[Local DNS > DNS Records]from the sidebar. Under the section calledAdd a new domain/IP combination, fill out underDomain:the domain you just added above (i.e.duplicati.home) and next toIP Address:you should add your server’s static IP address. Press theAddbutton and it will show up below.
To make sure it all works, enter the domain you just added (duplicati.homeif you went with my default) in a browser and you should see the Duplicati interface!
Configuring your Backups
Duplicati conceives of each “backup” as a “source” (folder of files to backup), a “destination” (the place the files should be backed up to), a schedule (how often does the backup run), and some options to configure how the backup works.
To configure a “backup”, click on +Add Backup button on the menu on the lefthand side. I’ll show you the screens I went through to backup my Docker container configurations:
- Add a name (I called it
DockerConfigs) and enter a Passphrase (you can use theGeneratelink to create a strong password) which you’d use to restore from backup. Then hitNext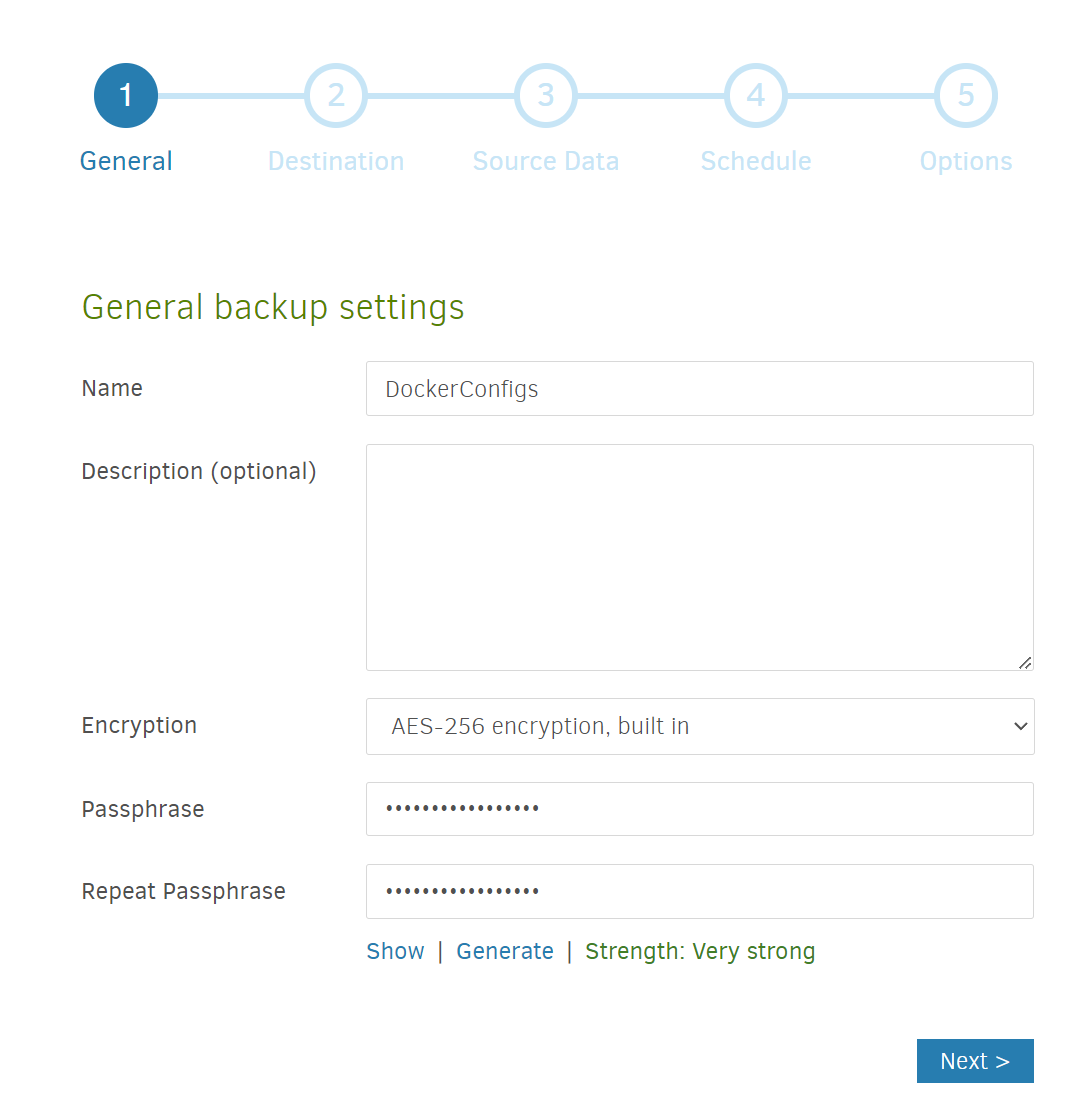
- Enter a destination. Here, you can select another computer or folder connected to your network. You can also select an online storage service.
I’m using Microsoft OneDrive — for a different service, a quick Google search or a search of the Duplicati how-to forum can give you more specific instructions, but the basic steps of generating an AuthID link appear to be similar across many services.
I selectedMicrosoft OneDrive v2and picked a path in my OneDrive for the backup to go to (Backup/dockerconfigs). I then clicked on theAuthIDlink and went through an authentication process to formally grant Duplicati access to OneDrive. Depending on the service, you may need to manually copy a long string of letters and numbers and colons into the text field. After all of that, to prove it all worked, pressTest connection!
Then hitNext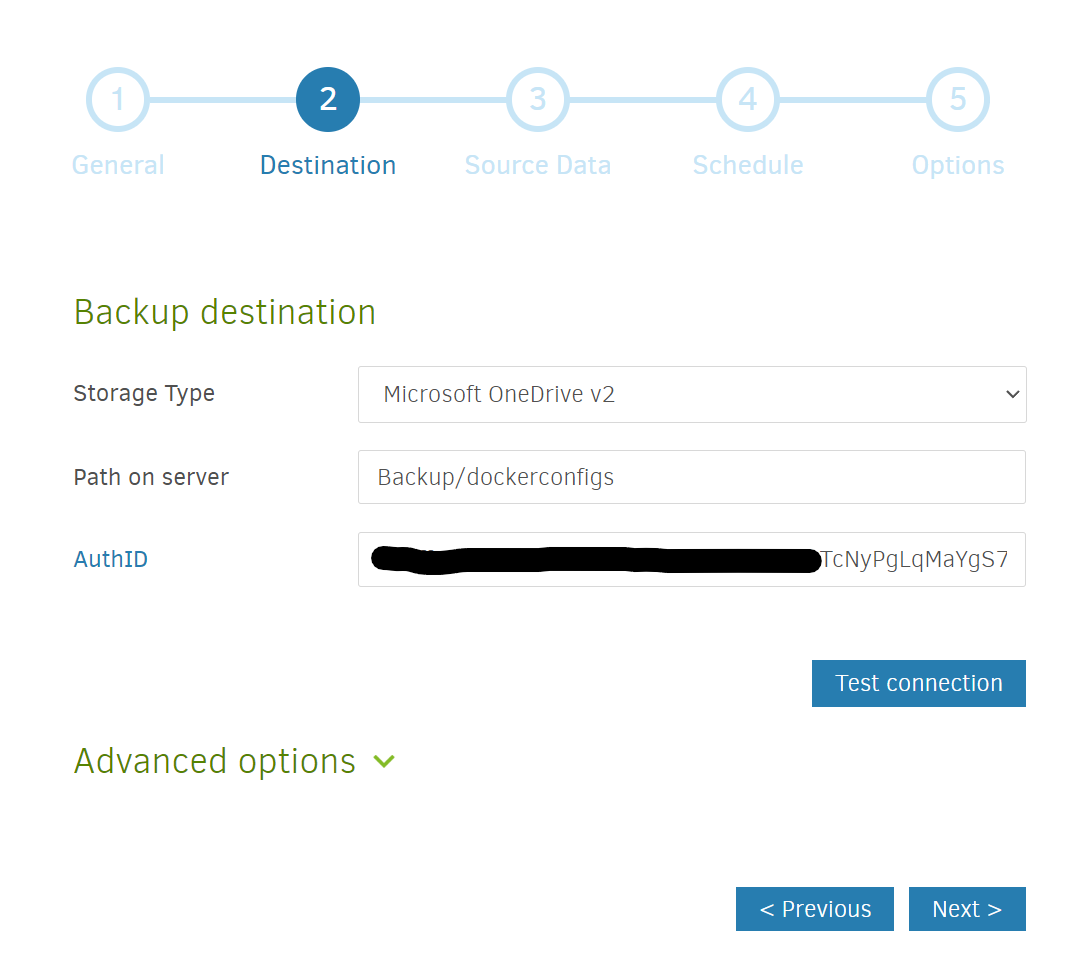
- Select the source. Use the folder browsing widget on the interface to select the folder you wish to backup.
If you recall in my configuration step, I mapped the<absolute path to shared config folder>to/containerconfigswhich is why I selected this as a one-click way to backup all my Docker container configurations. If necessary, feel free to shut down and delete your current container and start over with a configuration where you point and map the folders in a better way.
Then hitNext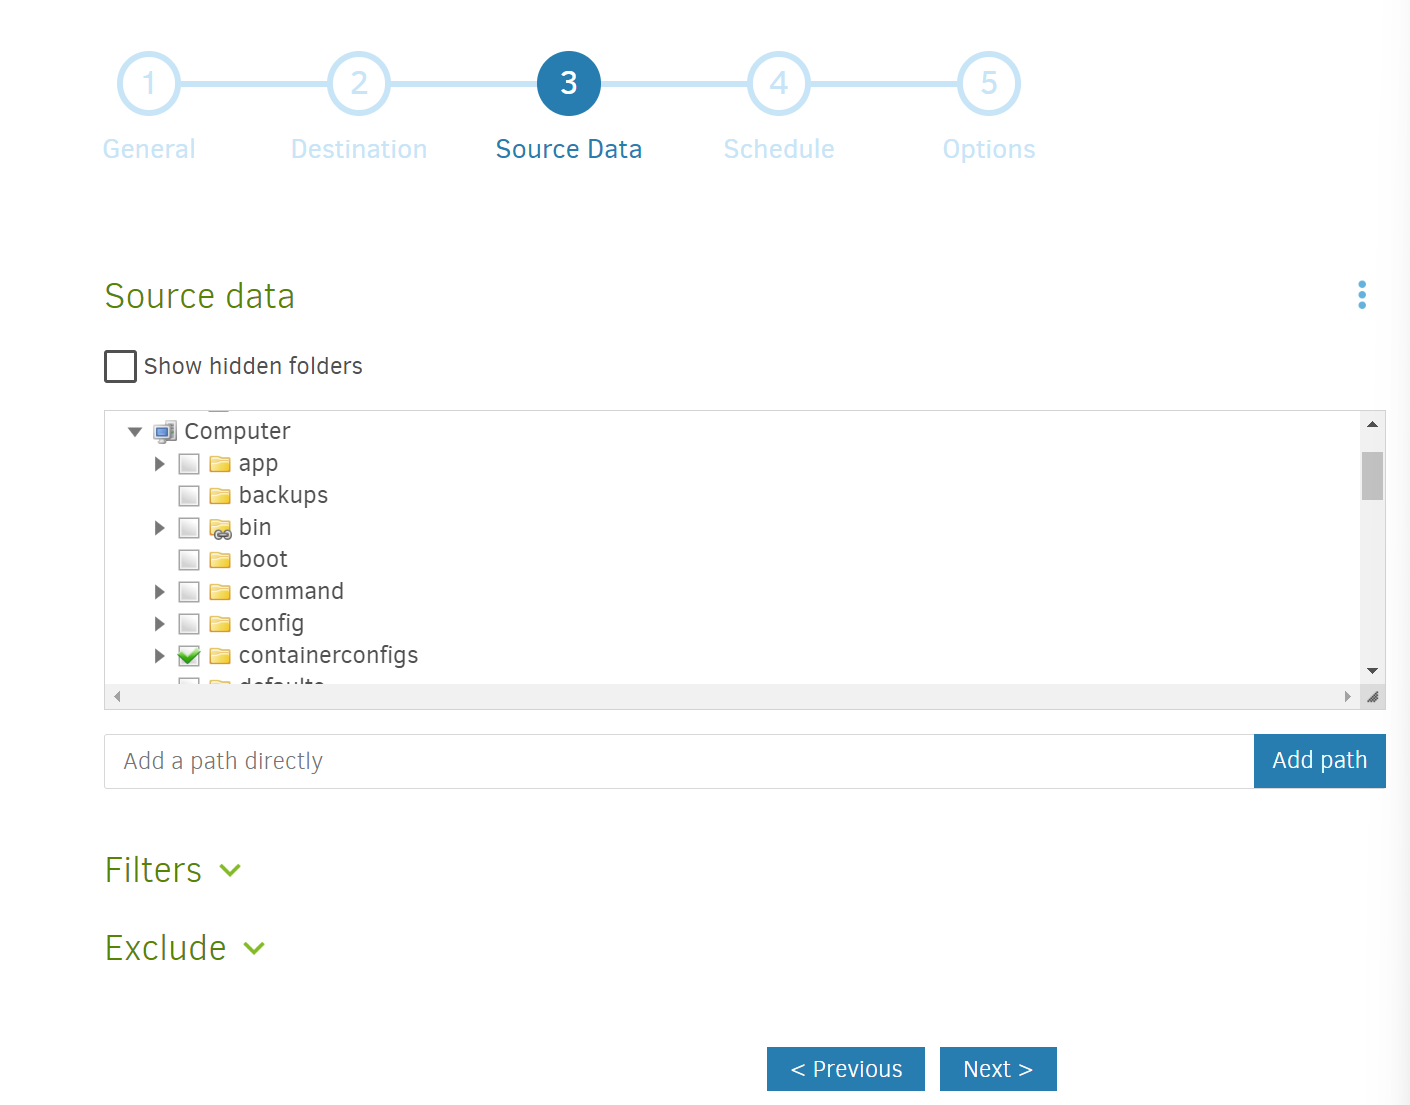
- Pick a schedule. Do you want to backup every day? Once a week? Twice a week? Since my docker container configurations don’t change that frequently, I decided to schedule weekly backups on Saturday early morning (so it wouldn’t interfere with something else I might be doing).
Pick your option and then hitNext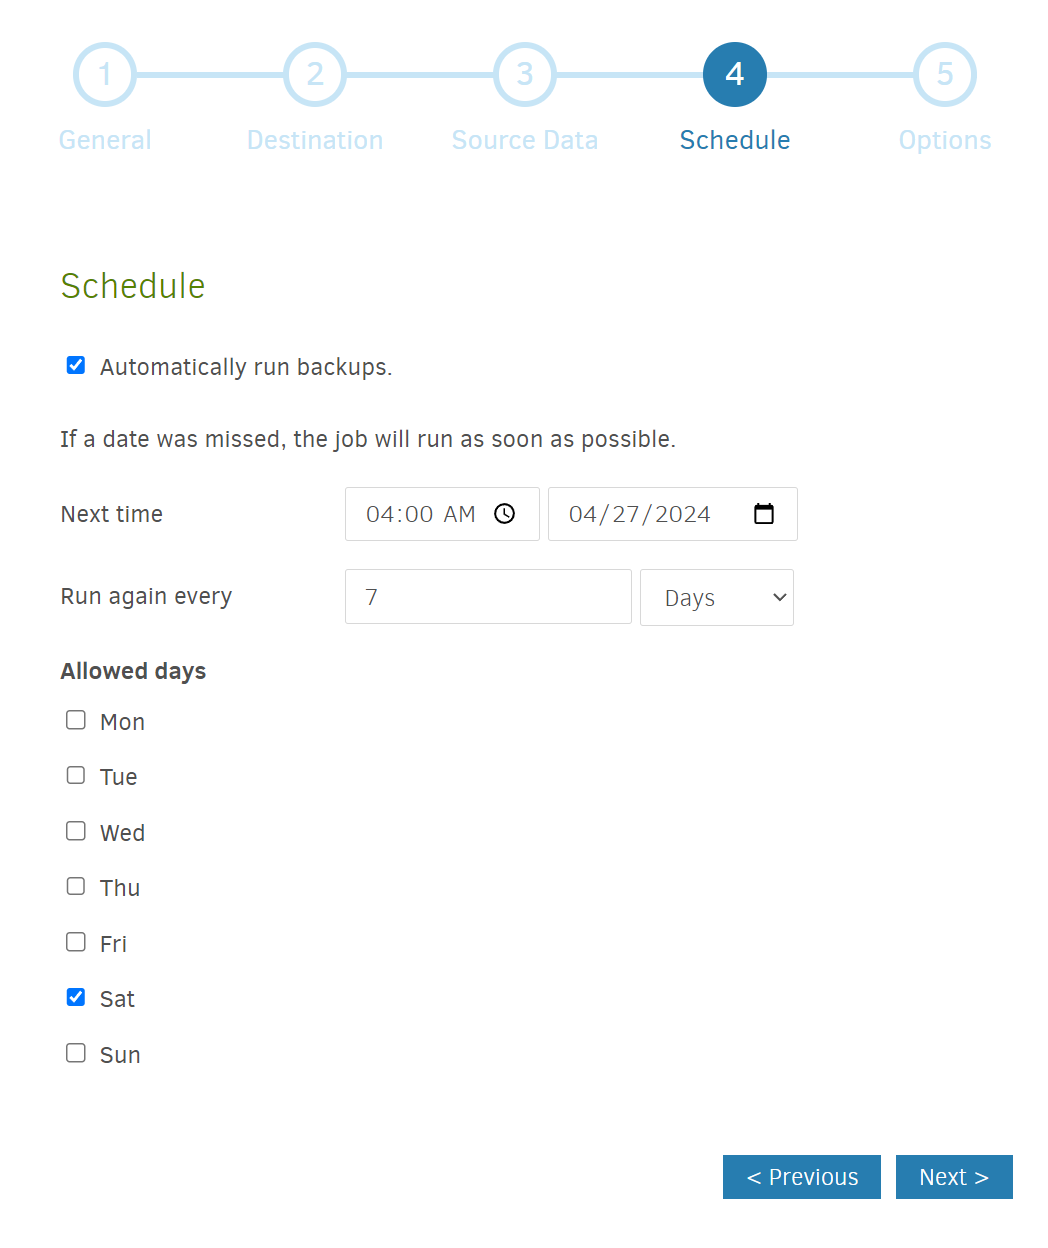
- Select your backup options. Unless you have a strong reason to, I would not change the remote volume size from the default (50 MB). The backup retention, however, is something you may want to think about. Duplicati gives you the option to hold on to every backup (something I would not do unless you have a massive amount of storage relative to the amount of data you want to backup), to hold on to backups younger than a certain age, to hold on to a specific number of backups, or customized permutations of the above.
The option you should choose depends on your circumstances, but to share what I did. For some of my most important files, I’m using Duplicati’ssmart backup retentionoption (which gives me one backup from the last week, one for each of the last 4 weeks, and one for each of the last 12 months). For some of my less important files (for example, my docker container configurations), I’m holding on to just the last 2 weeks worth of backups.
Then hitSaveand you’re set!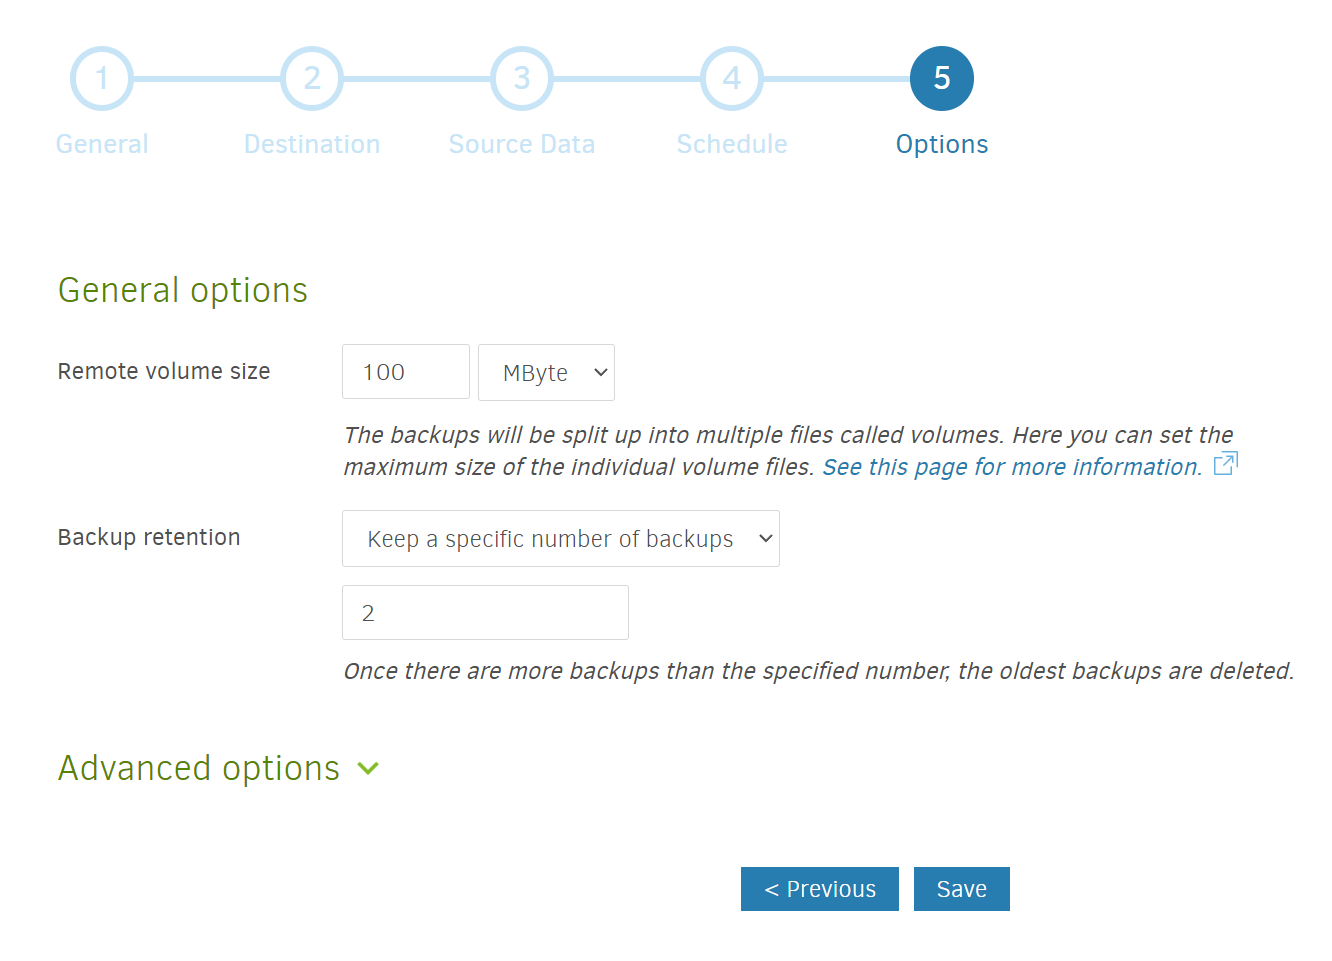
I hope this helps you on your self-hosted backup journey.
If you’re interested in how to setup a home server on OpenMediaVault or how to self-host different services, check out all my posts on the subject!